


Designing a course from scratch can feel overwhelming, where do you even start?
Whether you’re building an online course, corporate training, or in-person workshop, great course design is what separates an average learning experience from one that students remember, enjoy, and complete.
The good news? You don’t have to start with a blank page.
In this guide, we’ll walk you through how to design a professional, effective course step by step, and give you 5 free downloadable course design templates (in PDF and Word) that make the process faster and easier.
What Is Course Design (and Why It Matters)?
Course design is the process of planning how your course will teach students, not just what it will teach.
It is about creating a learning experience that helps your students reach a clear goal, through structure, flow, and practical activities.
When done right, good course design:
- Makes your lessons easier to understand
- Improves student engagement and completion rates
- Builds your reputation as a professional instructor
- Helps you save time when creating or updating your course
Think of it this way: course design is your blueprint, it organizes your knowledge into a logical, impactful learning path that delivers results.
Step 1: Define Your Learning Outcome
Every great course starts with a crystal-clear goal.
Ask yourself:
“What should my students be able to do by the end of this course?”
The answer to that question becomes your learning outcome, the north star that guides your entire design.
Here are a few examples:
- “By the end of this course, students will be able to design a simple website using WordPress.”
- “Participants will learn how to create and manage a monthly social media calendar.”
- “Students will be able to deliver effective sales presentations using storytelling techniques.”
If you can’t summarize your outcome in one sentence, your course is probably too broad. Start small and focused, you can always expand later.
Step 2: Identify Your Target Learners
Your students determine everything, from your tone and visuals to your examples and pace.
Here’s what to consider:
- Who are they? (beginners, professionals, business owners, etc.)
- Why are they taking your course? (career growth, certification, hobby)
- What challenges do they face?
- How much time can they realistically commit each week?
Example:
If you’re designing a “Data Analytics for Beginners” course, your audience might be young professionals who are new to analytics, need visual explanations, and prefer short, digestible modules.
Understanding your learners helps you create lessons that truly connect and deliver value.
Step 3: Choose the Right Course Format
Your design will look different depending on how your students will learn.
There are three main types of course formats:
- Self-Paced Online Courses
- Best for evergreen learning.
- Use short video lessons, quizzes, and templates.
- Example platform: SchoolMaker
- Cohort-Based Courses (CBCs)
- Students learn together in real time with set start and end dates.
- Includes live sessions, group projects, and accountability.
- Example: Part-Time YouTuber Academy by Ali Abdaal.
- In-Person or Hybrid Training
- Great for corporate or skill-based learning.
- Combines workshops, presentations, and group discussions.
Your chosen format determines the type of activities and templates you’ll use in your design.
Step 4: Map Out Your Course Structure
Now it’s time to organize your content into a clear learning journey.
Here’s a simple 4-step framework to structure your course:
- Introduction: Welcome students, explain the goal, and set expectations.
- Core Modules: Break down your main topics into 4–6 sections, each with its own goal.
- Activities & Application: Include exercises, templates, or projects to help students practice.
- Conclusion & Next Steps: Summarize key takeaways and guide students on what to do next.
Example:
Course: “Email Marketing for Small Businesses”
Structure:
- Module 1: Understanding Email Strategy
- Module 2: Building a Subscriber List
- Module 3: Writing High-Converting Emails
- Module 4: Automating Campaigns
- Module 5: Analyzing and Optimizing Results
Each module should end with a small win, something your students can apply right away.
Step 5: Create Engaging Learning Activities
Activities turn information into transformation.
Instead of long lectures, focus on active learning. This helps your students retain information and apply it faster.
Here are a few activity ideas you can add to your course design:
- Reflection Prompts: Ask learners to write or think about how a concept applies to them.
- Downloadable Templates: Checklists, worksheets, or planning tools.
- Mini Quizzes: Quick recaps to reinforce learning.
- Practical Projects: “Create your first ad campaign” or “Build your personal website.”
- Peer Feedback: Encourage discussions or group reviews if your course is cohort-based.
You don’t need to overcomplicate it, even simple, well-timed activities make a huge difference.
Step 6: Design for Different Learning Styles
Everyone learns differently. Some people prefer visuals, others like reading or doing.
To make your course more inclusive and effective, try to mix different formats:
Learning Style
Include…
Visual Learners
Slides, infographics, videos
Auditory Learners
Voice-over lessons, podcasts, discussions
Reading/Writing Learners
PDFs, transcripts, summaries
Kinesthetic Learners
Hands-on exercises, templates, projects
A balanced mix ensures your course stays engaging for all types of learners.
Step 7: Build Your Course Outline
Once you’ve defined your learning outcomes, audience, and structure, it’s time to put it all together into a course outline.
Your outline is the roadmap for your course, a list of every module, lesson, and activity.
Here’s a quick example:
Course Title: “Mastering Personal Productivity”
Outcome: Students will learn how to plan, prioritize, and stay consistent using proven productivity systems.
This outline becomes your design template for every future course you build.
Step 8: Develop a Consistent Look & Feel
Visual design plays a big role in how students experience your course.
Use consistent branding, colors, fonts, and layouts, to make your course look cohesive and professional.
Here’s how to keep it simple:
- Pick two fonts, one for headings and one for body text.
- Choose two main colors, a primary color and an accent.
- Use consistent slide layouts for all lessons.
- Keep visuals clean, readable, and distraction-free.
If you’re using a platform like SchoolMaker, they usually have built-in design options, just customize them to match your brand.
Step 9: Add Feedback and Assessment Tools
A well-designed course includes ways for students to measure progress.
This could include:
- End-of-module quizzes to test understanding.
- Progress bars or completion badges to motivate students.
- Instructor feedback for personalized guidance.
- Peer reviews in cohort-based courses.
These elements create accountability and make students feel supported.
Step 10: Collect and Implement Feedback
Even the best-designed courses improve over time.
After your first group of students completes the course, ask for feedback on:
- The clarity of lessons
- The pacing and structure
- The relevance of examples
- The usefulness of activities and templates
Use surveys (Google Forms or Typeform) to gather responses, and use that data to update your course design templates for the next version.
Free Course Design Templates (PDF & Word)
To make the process easier, we’ve created 5 free course design templates that you can download instantly in both PDF and Word formats.
These templates will help you organize your course idea, structure, and activities step by step, without needing to start from zero.
1. Course Planning Template
Plan the overall direction of your course, including your learning outcomes, target audience, and key topics.
Sections include:
- Course title and description
- Audience profile
- Learning goals
- Key topics & outcomes
Download: [Course Planning Template – PDF]
Download: [Course Planning Template – Word]
2. Course Outline Template
Map out your full course structure, modules, lessons, and learning activities.
Sections include:
- Module titles and lesson breakdown
- Lesson format (video, quiz, reading, etc.)
- Estimated duration
- Notes for each section
Download: [Course Outline Template – PDF]
Download: [Course Outline Template – Word]
3. Lesson Design Template
Plan each individual lesson for clarity and engagement.
Sections include:
- Lesson objectives
- Lesson content summary
- Activities or examples
- Resources and materials
- Assessment questions
Download: [Lesson Design Template – PDF]
Download: [Lesson Design Template – Word]
4. Activity & Assessment Template
Design interactive learning activities and evaluations to check progress.
Sections include:
- Activity goal and type (quiz, project, discussion)
- Instructions and expected outcomes
- Grading criteria or self-assessment
- Materials needed
Download: [Activity & Assessment Template – PDF]
Download: [Activity & Assessment Template – Word]
5. Course Evaluation & Feedback Template
Use this template after your course to gather student feedback and insights for improvement.
Sections include:
- Overall course satisfaction
- Lesson clarity
- Instructor effectiveness
- Suggestions for future updates
Download: [Course Evaluation Template – PDF]
Download: [Course Evaluation Template – Word]
How to Use These Templates Effectively
- Start with the course planning template to define your main goals.
- Use the course outline template to structure your modules.
- Move to the lesson design template to plan each lesson clearly.
- Include activities and assessments to make learning interactive.
- End with course evaluation to refine and improve your course.
These templates work perfectly for both individual instructors and organizations creating internal training programs.
Tips for Designing Courses That Sell
If your goal is not just to teach, but also to grow your income, here are a few bonus design tips to make your course more marketable:
- Start with results, not information. Learners buy transformation, not just knowledge.
- Keep lessons short and practical. Bite-sized content is easier to consume.
- Add templates and worksheets. They increase perceived value and completion rates.
- Include real-world examples. This makes your content more relatable.
- Design a strong first module. Students decide whether to finish a course after the first 30 minutes.
A well-designed course naturally markets itself, satisfied students become your best promoters.
Good Design Gets Students In. Great Outcomes Keep Them Coming Back.
You now have everything you need to design a course that looks professional and flows logically. But the best-designed course in the world only delivers ROI if students actually finish it.
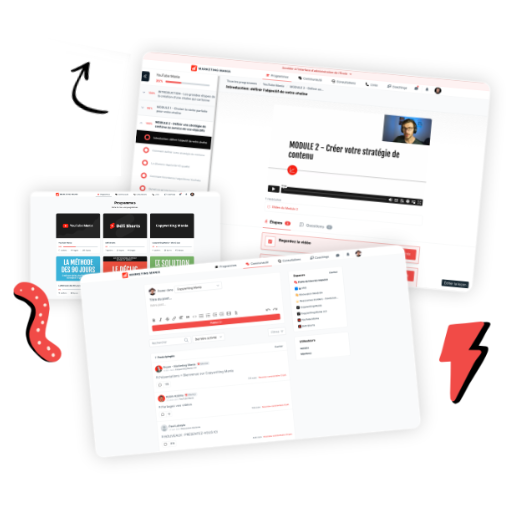
That's the gap SchoolMaker is built to close. It takes your well-designed course structure and adds the milestones, accountability, and community features that keep students progressing, all the way to the result you promised them.
When students complete your course and get real results, they don't just disappear. They leave testimonials, refer others, and return for your next offer. Your course design becomes the foundation of a referral-driven business.
Try SchoolMaker free and see how better learner outcomes drive more course sales.
Conclusion
Designing a course doesn’t have to be complicated or time-consuming.
With the right structure, clear learning goals, and helpful templates, you can create a professional, results-driven course that’s easy to teach and even easier to update.
So instead of starting from scratch, use the free templates above to jumpstart your design process.
By focusing on thoughtful structure and engaging learning experiences, you’ll not only create a course that sells, you’ll create one that truly transforms your students’ lives.


