


So you’ve decided to create your first eLearning course, maybe to share your expertise, train employees, or grow your online business. That’s a great decision. But now you’re asking the big question: “Where do I even start?”
You’re not alone, most people get stuck between having a great idea and actually building a structured, engaging course. The truth is, developing an eLearning course from scratch isn’t about fancy tools or expensive studios. It’s about clarity, structure, and good design.
In this guide, we’ll walk through the exact step-by-step process for developing a high-quality eLearning course, from your first idea to launch day.
Step 1: Define Your Goal and Audience
Every great eLearning course starts with one question:
“Who am I teaching, and what transformation do I want them to achieve?”
Before you record a single video or open any software, take time to clearly define:
- Your audience: Who are they? What do they need help with?
- Their pain points: What problems are they trying to solve?
- Your learning outcome: What should they be able to do after taking your course?
Example:
If you’re creating a course on “Digital Marketing,” your goal might be:
“Help small business owners create and run Facebook ad campaigns that bring in new customers.”
That’s clear, actionable, and measurable, exactly what you need to build your foundation.
Step 2: Conduct Research and Validate Your Idea
Before investing time in building, make sure your topic is something people actually want to learn.
Do a quick validation check by:
- Searching online platforms like Udemy to see if similar courses exist.
- Reading student reviews to find what’s missing in other courses.
- Surveying your audience through email, social media, or forums.
- Checking search demand with tools like Google Trends or AnswerThePublic.
If other people are teaching your topic, that’s a good sign, it means there’s demand.
Your job is to make yours better, clearer, or more personal.
Step 3: Write Clear Learning Objectives
Once your idea is validated, define your learning objectives, the backbone of every great eLearning course.
A good learning objective answers this question:
“What specific skill or knowledge will students gain from this lesson?”
Keep each objective measurable and action-oriented.
Example:
❌ “Students will understand how social media works.”
“Students will create a 7-day content calendar using social media management tools.”
Each lesson should lead toward completing your overall course goal.
Step 4: Design Your Course Outline
This is where your course takes shape.
Break your course into modules and lessons, each building logically toward the final outcome.
Here’s a simple structure you can follow:
Think of your outline like a roadmap. It keeps your course organized and ensures students never feel lost.
Step 5: Choose the Right eLearning Tools
In 2026, there’s no shortage of amazing tools to help you build and deliver your course.
Here’s what you’ll typically need:
1. Authoring Tool (for creating content)
These tools help you build modules, quizzes, and interactive lessons.
Popular options include:
- Articulate 360: great for professional eLearning design
- iSpring Suite: integrates with PowerPoint
- Canva: for designing slides, visuals, and workbooks
- Loom or Camtasia: for recording lessons and screen tutorials
2. LMS (Learning Management System)
This is where your course will live. The LMS handles student access, tracking, and payments.
Top LMS platforms for 2026 include:
- SchoolMaker: great for course creators and coaches
- LearnWorlds: strong interactivity and analytics
- Thinkific: good for professional course creators
- Kajabi: full marketing and sales automation suite
3. Engagement Tools
Boost student participation with:
- Mentimeter (for polls and quizzes)
- Typeform (for feedback forms)
- Circle or Discord (for private learning communities)
Choose tools based on your goals, not trends. The best tech stack is the one that keeps things simple and scalable.
Step 6: Create Your Course Content
Now it’s time to bring your lessons to life.
But don’t just start recording videos, plan your content carefully.
1. Mix Up Content Formats
Keep things engaging by blending different types of learning materials:
- Videos (tutorials, screen recordings, talking-head lessons)
- Text guides (summaries, step-by-step instructions)
- Audio (podcast-style explanations)
- Quizzes (short reviews to test understanding)
- Downloads (templates, worksheets, or checklists)
Variety keeps students engaged and accommodates different learning styles.
2. Keep Lessons Short
Aim for 5–10 minute videos focused on one idea each.
Short, focused lessons are easier to digest, and keep completion rates higher.
3. Focus on Real-World Application
Always connect lessons to real scenarios.
Give students tasks they can complete immediately after each lesson.
4. Maintain a Human Touch
Even if your course is automated, make it personal.
Add short introductions, student shoutouts, or casual behind-the-scenes videos to make the experience feel human.
Step 7: Design for Engagement
An effective eLearning course doesn’t just teach, it keeps students learning actively.
Here are ways to make your course more engaging:
- Add interactive elements (clickable quizzes, polls, drag-and-drop activities).
- Include case studies that show theory in practice.
- Build a community for students to share progress and ask questions.
- Offer certificates or badges for completion milestones.
- Use drip content, releasing lessons over time to maintain motivation.
Most tools now offer built-in engagement features, making it easier than ever to design interactive learning.
Step 8: Test and Review Your Course
Before launching publicly, test your course with a small group, often called a beta group.
Ask them to go through the lessons and provide feedback on:
- Clarity of content
- Technical quality (audio, video, navigation)
- Lesson pacing
- Engagement level
Encourage honest feedback, even if it’s critical.
This early testing stage helps you catch issues before your real students do, and it’s one of the secrets behind professional eLearning success.
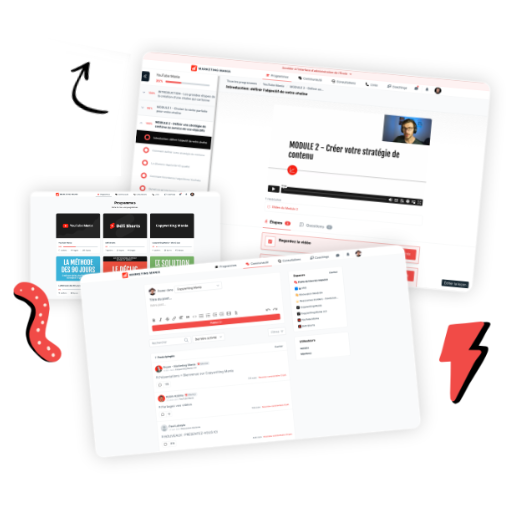
Step 9: Set Up Your Course Platform
Once your content is ready, it’s time to upload and organize everything inside your LMS.
Typical steps include:
- Uploading videos and lesson materials
- Setting up quizzes, assignments, or discussion boards
- Creating certificates of completion
- Customizing your course homepage and visuals
- Setting enrollment and pricing options
- Connecting your payment gateway (Stripe or PayPal)
SchoolMaker makes this process beginner-friendly, no coding needed.
Step 10: Launch Your eLearning Course
Now comes the exciting part, sharing your course with the world!
But don’t just upload and hope people find it.
Create a launch plan that builds awareness and momentum.
Here’s a simple 3-phase launch strategy:
Phase 1: Pre-Launch
- Tease your course on social media
- Send emails with sneak peeks
- Offer a free resource or webinar
Phase 2: Launch Week
- Announce your course officially
- Offer limited-time bonuses or discounts
- Go live with Q&A sessions
Phase 3: Post-Launch
- Collect testimonials from early students
- Update your sales page with real feedback
- Keep promoting your course through evergreen funnels
A coach or launch strategist can also help you fine-tune this stage for maximum sales and visibility.
Step 11: Track, Improve, and Scale
The best eLearning courses are never finished.
After your launch, monitor your results closely:
- Completion rates
- Student feedback
- Sales and conversions
Then use that data to refine your course:
- Add new lessons or bonus materials
- Update examples to stay current
- Improve video quality or pacing
Once your first course is running smoothly, you can scale by:
- Creating advanced versions or spin-off courses
- Building memberships or bundles
- Automating your marketing funnels
This is how top creators turn one eLearning course into a full online education business.
Conclusion
Creating your first eLearning course can feel overwhelming, but remember, every expert started from scratch. You don’t need to be perfect to start teaching, you just need to start.
Focus on helping people solve a problem, one lesson at a time. Because every course you create not only grows your business, it multiplies your impact.


