


1. The 80/20 sales page
We have a ton of copywriting experience. We run a 7-figure course business, our copywriting videos have millions of views, and we even have a whole copywriting course (how meta!).
So let us tell you… you don’t need all those fancy techniques right now.
Does advanced copywriting work to get a lot more sales? You bet it does. But here’s the kicker: copywriting won’t turn a losing product into a money-making machine. Advanced copywriting is best used to turn a solid product into a freaking monster.
You’re not there yet. Your only goals right now should be:
- Validating that people actually want your product
- Getting feedback from some paid customers
You can worry about optimizing your conversions to the moon later. For now, we’re aiming for “simple but effective”.
You can start with following this simple structure. It shouldn’t take more than a few hours to write the whole page.
We call it “the 80/20 sales page” after the famous pareto principle, which states that 80% of your efforts come from 20% of your effort. And indeed, this simple structure should take you 80% of the way.
Here it is:
- Hook
- Problem
- Solution
- Results
- Explanation of the pre-launch concept
- What you will receive
- Credibility and Social Proof
- Satisfaction Guarantee
- The cost of inaction
- FAQ
- Contact
1. Hook
Title: Name of your product You chose your course’s name in Chapter 1.
Subtitle: Your Unique Selling Proposition (USP) You also defined your USP in Chapter 1.

2. Problem
Qualification: Who is this product for? Who is it not for? It’s important for people who visit your page to know if your course is made specifically for them. From your interactions with beta students and your positioning, you should be able to write down a few paragraphs explaining who your course is for, and who won’t be a good fit.
Here are 2 examples from the Part-Time YouTuber Academy:


Pain: Describe your student's problems
When describing their problems, try to use the exact words that they would use themselves. You can even quote directly from your beta students or your research.
Here is an example from the Part-Time YouTuber Academy:

Origin of the problem: Describe the "hidden" cause of these problems
Your experience allows you to see the root issues that affect your student. If you could only fix those, everything would be better… This will allow you to introduce your course as the logical solution to your student’s problems.
Here is an example from the Part-Time YouTuber Academy:

3. Solution
The solution flows logically from the "Source of the problem"
This is when you present your course as the ideal solution!
For example, in the Part-Time YouTuber Academy, the hidden source of the problem is “making videos in a haphazard manner”, so the solution is to build a repeatable system. The course shows you exactly how to do this.
4. Results
A few expected benefits of your solution
Try to explain these benefits in a concrete, emotional and visual way. For this, you can use examples, images, before-after sections, vivid descriptions, stories...
<p class="warning"> ⚠️ Focus on a few key benefits instead of selling a cure-all
A single course that claims to help you:
• Be more productive
• Be more confident
• Make more friends
• Be happier
• Build better habits
• Make more money
• Find love
• Get in shape
Is clearly less credible than a course that just promises you six-pack abs.
Can you even remember all the benefits from the first list? We can’t (and we wrote it!). Focus on one main benefit, and at most two more secondary benefits. But don’t overdo it.</p>

In this example, each section is a spin on one of three benefits:
- You’ll take action and (finally) get started
- You’ll feel more confident in your skills as a YouTuber
- You’ll never feel overwhelmed again thanks to a repeatable system
Storytelling: your story, a real student's, or your future student’s
To make your benefits even stronger, you can tell your own story or that of a student. If you’re not comfortable doing that, you can also start this section with "Imagine if...", and make your students visualize how their life could be different.
5. Explanation of the pre-launch concept
<p class="tip">💡 You can delete this part once you launch the full course</p>
Think of this pre-launch as doing your own Kickstarter: if the project is not successful, you will refund everyone. But if you get enough sales, you’ll create the product.
It’s important to explain this on your sales page because it is a somewhat unusual strategy for a course. It’s only fair to be upfront about what stage the product is in, and when it will be delivered. The point of this section is to answer their objections when it comes to pre-launches.
You've always created free content — and that won't change
This is mostly useful if this is your first paid product. Explain that you want to offer something more complete to those who want to go further in [your topic], and support you.
But you want to see how many people are interested before creating a whole product — so here's the deal:
- Explain that those who order will get a discount, personalized support, and their feedback will be cherished and applied.
- If there are not enough orders, they will get their money back and a free bonus (like a pdf, a checklist, or a template).
- Inform them that the pre-launch discount and bonuses will be available until a specific date (a few weeks after you plan on launching with your first section).
6. What you will receive
Reminder of the title and the USP
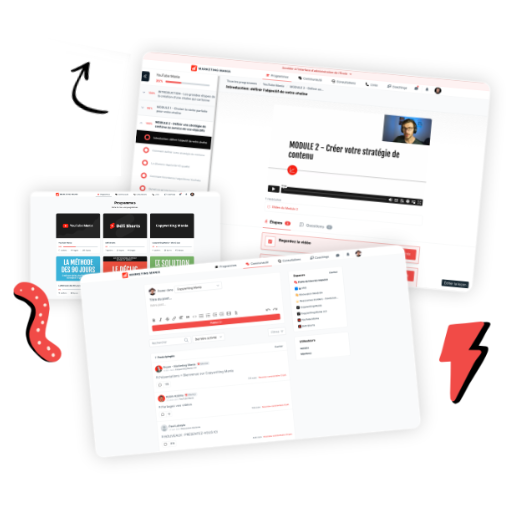
(Optional) Your Product visuals You can use a tool like Canva to make them.
Summary of the contents of your course:
- Title of your course sections
- 3 to 10 benefits of each section to present as bullet points.
Price of your course
Call to Action #1: "Buy the course" This button will redirect to your payment page.
7. Credibility
"Who am I?" and your results
Introduce yourself, why you are creating this product and why they should trust you. You don’t need to be a rock star in your niche to be credible, you just need to be more experienced than your reader.
Testimonials and social proof
You can ask your beta students for testimonials, and use the results they got as case studies.

8. Satisfaction Guarantee
Duration of the guarantee
We recommend a tried-and-true “30-Day Money-Back Guarantee”.
We recommend a generous refund policy: "No strings attached, no questions asked". This shows that you have skin in the game, and will limit your own imposter syndrome.

In this exemple, they offer a 60 days money-back guarantee, which is conditional on completing the material. This can be a good option once your course is fully built out.
9. The cost of inaction
Visualization
What will change in your customer's life after they complete your course?
The cost of inaction
What will happen to your customer's life if they do NOT buy your product? How will his problem get worse over time?
Here are some copy examples:
- "You have two choices...", and then present the outcome of following your course and applying it, and compare it to the outcome of doing nothing.
- You can ask them "If you do nothing, where will you be in a year?".
Call to Action #2: "Buy the course" — This button will redirect to your payment page.
10. FAQ
Answer to objections that may prevent a purchase, as well as common questions people could ask themselves
- "Will it work if [I have no idea / no time / no education / have not exercised for a long time]"
- "What happens if I'm not satisfied?"
- "Can't I do this on my own / find the information online?"
- "What is the difference with other courses available on the web?"
- "How long will it take to get results?"
- Other questions your students may have

11. Contact
Call to Action #3: "Buy the course"
This button will redirect to your payment page.
Add your contact of choice:
- Facebook Messenger
- Phone number
- Appointment link (Calendly, Youcanbook.me…)
2. Writing and refining your sales page
5 tips for writing sales pages that convert
Let’s go through some extra copywriting tips:
- No one cares about you
Please remember this friendly piece of advice : “NO ONE CARES ABOUT YOU — they only care about themselves”.
Don’t talk about yourself. Don’t even talk about your product that much! Instead, talk about your student’s problem, the solution to that problem and how their life will change.
Didn’t we say you should introduce yourself and talk about your story? Sure! But only to the extent that it connects to your student’s problem.
Think about it: what did I tell you about us and our team? That we have sold a lot of courses at Marketing Mania, and that we have helped hundreds of course creators grow their business. That’s pretty much it, right? I didn’t tell you that we have a completely remote team, or that SchoolMaker is an entirely bootstrapped startup. Because you don’t care.
But okay, those are completely off-topic, right? What about describing your product?
Well… what have I told you so far about our product SchoolMaker? I showed you how it could make specific aspects of your course better: action steps, built-in community, a better way to answer questions.
There was no section that said “here’s what SchoolMaker is and why it’s good”, because you simply would not care. I only wrote about some issues you might have, like building an exciting course, and I showed you that SchoolMaker was a good solution to those issues.
Here’s a test you can do: use ctrl + F / cmd + F to search your page and compare how many times you wrote “ I “ and “ you ”. You should aim for at least 5 times more “you” than ”I” on your page.
Let’s do the test, shall we? On this very page, I wrote “I” or “We” 28 times and “you” 239 times.
- Use short sentences and let your text breathe
Many people try to cram a bunch of ideas into the same sentence, like they are getting charged for each time they hit the “period” key or something.
Long sentences are actually much harder to write - and much harder to understand. Who wants to wrap their head around a long convoluted sentence?
Do yourself (and your reader) a favor, and give that period key a little workout.
- Be as specific as possible
For example, instead of writing “You want to lose weight, right?”, you can write “Every time you see yourself in a photo, do you make yourself the promise that you will lose these extra pounds?”
The crucial difference is that “lose weight” is an intellectual concept — and that doesn’t evoke much emotion. You want your reader to feel the emotion, and for that they have to visualize what you are talking about.
This extends to anything you might talk about. Don’t say “I helped a reader lose a lot of weight” say “I helped Jason lose 15 pounds - and here’s the before and after picture”. Don’t say “Mark was able to build a successful business!”, say “Mark was able to quit his accounting job when his new product made $ 15,684 in only 5 weeks”. - Paint a picture
This is related to the previous point: you have to make us SEE the change.
Take us to the movies in our imagination. Make us feel the pain of your current situation, and then make us feel the ecstasy of having fixed it.
Instead of writing “You are not productive”, you can write “By the end of each day, your to-do list is longer than what you woke up with”. Ouch!
But also: “What if you could leave work every day at 4 pm, and go golfing knowing you have done everything you planned?”. Well, the “golfing” does quite a bit of work here. This sentence goes from a vague promise of “leave work early” to a specific image of a happy person grabbing their club bag and heading out to the golf course. - Write like you are sending an email to a friend
Would you use that “fancy word” in an email to a friend? Would you use it verbally while talking about your product?
If not, just get rid of it. Imagine you are telling a friend about your product: that’s the tone you should aim for.
If you’re feeling unsure, do a trial by fire: read your sales page aloud (to someone else if you dare) and pay attention to what feels unnatural. You should be able to spot some unnecessary “fancy words” and maybe cut down a long sentence or two.
Refining your sales page in 3 steps
By now, you should have a solid first version of your sales page. You’ve done the hard part, congratulations!
To make sure that your sales page is completely bulletproof, you can go through 3 quick rounds of editing:
- First Edit: Anticipate the reader’s objections
- Second Edit: Omit unnecessary elements
- Third Edit: Correct grammatical and spelling mistakes
First Edit: How to anticipate the reader’s objections
Put yourself in the shoes of a skeptical reader, and ask yourself the following questions:
- What is unclear? → Make it clearer. You might need to simplify, or add examples or proof.
- Is there industry specific jargon that I may have a hard time understanding? → You could define the word, but most of the time it’s better to just get rid of it and use everyday words. Leave the glossary for the inside of your course.
- Is the reader likely to have some invalid prior assumptions about my topic → Address these assumptions head on. Conversely, if you write with some assumptions that might not be clear to a less experienced reader, you should spell them out.
Can you see how we did that in the section above called “No one cares about you”? It may be counterintuitive to many that your sales page is not actually about your product, so I had to address the assumption directly. - Will the reader have objections to buying my course? → Address these objections in advance.
Example: “Build the habit of writing every day, even if you have a busy schedule.” (Anticipate the objection of “I have no time!”).
Second Edit: The secret to keeping your text short, but impactful
“My most important piece of advice to all you would-be writers: When you write, try to leave out all the parts readers skip”. This is excellent advice from novelist Elmore Leonard.
Count the words in your document at this moment. Now try to cut 15% of those words.
Here’s what to look out for:
- 2 sentences that convey the same idea.
- Long sentences that could be shorter
- Descriptions that are too vague
- Unneeded adjectives
- Most adverbs should probably be cut
- Any sentence that is not absolutely necessary to the flow of your page
<p class="warning"> ⚠️ The worst way to make a point is repeating it
Here’s a common mistake people make: you have something important to say. You write a sentence to say it. You feel like this is really important. So you stress it by writing a second sentence.
This does NOT work. All you did was turn a weak sentence into two.
What you should do instead is go back to the original sentence and make it stronger.
For example, the original title for this little box was “What if you want to emphasize something by repeating it?”. It doesn’t make the point nearly strongly enough. So we rewrote it to: ”The worst way to make a point is repeating it”. We made the sentence stronger.
Let’s look at another example.
Emphasizing with repetition
“I will teach you how to convert more prospects into customers, while gaining their trust ethically. This will allow you to make more sales and help more people, which will help your business grow, while remaining differentiated.”
Emphasizing without repetition
“Learn how to write hypnotic sales pages without looking like a scammer”</p>
Third Edit: Correct grammatical and spelling mistakes
This one is the quickest one.
In our day of autocorrect, you barely have to know how to spell. You can use a tool like Grammarly to correct any remaining mistakes.
3. Setting up your sales page
You can use any tool you are comfortable with to create your sales page, but if you are a beginner when it comes to creating websites, or if you are looking for a very quick and reliable solution, we recommend using Carrd.
There are a lot of great templates available for Carrd, so you can create your sales page quickly and publish it on the internet in one afternoon.
Here are a few places where you can find Carrd templates: One Page Love, The Carrd Library or Zite.
You can use this video to learn how to use Carrd, and implement your sales page easily.
(can change CTA here to "start free trial")


