


So you’ve created an amazing course, now it’s time to get people to actually buy it.
And that starts with one thing: your sales page.
A strong sales page can make the difference between a course that quietly collects dust and one that sells consistently month after month.
In this guide, we’ll show you how to create a high-converting course sales page, step by step, along with real examples, tips, and a structure you can easily follow.
What Is a Course Sales Page (and Why It Matters)?
A course sales page is where potential students decide whether to join your program or not.
It’s not just a landing page with a “Buy Now” button, it’s your digital salesperson.
It tells visitors:
- What your course is about
- Who it’s for
- Why it’s valuable
- What transformation they’ll get
And most importantly, it gives them the confidence to buy your course.
A well-designed sales page answers every possible question or objection your reader might have, before they even think to ask.
What Makes a High-Converting Course Sales Page?
The best sales pages have one thing in common: they connect emotionally and logically.
They make the reader feel understood, then show them exactly how your course will solve their problem.
Here’s what every high-performing course sales page includes:
- A clear, benefit-driven headline
- A strong story or emotional hook
- A problem–solution structure
- Real results and proof
- A simple explanation of what’s inside
- A visible, clear call to action (CTA)
- Social proof (testimonials, numbers, reviews)
- Risk-reversal (guarantee or refund policy)
Once these pieces are in place, the rest is just good storytelling and design.
Step 1: Start With a Powerful Hook
Your headline is the first thing people see, and often the only thing they read before deciding if the page is worth scrolling.
So your goal is to instantly grab attention and communicate value.
A good hook includes:
- The course name
- The main transformation
- A hint of how it’s achieved
Example 1:
“Launch Your First Online Course in 30 Days, Even If You’ve Never Created One Before.”
→ Focused, specific, and addresses a common fear (being a beginner).
Example 2:
“Master Excel for Business, Learn the Practical Skills That Save You Hours Every Week.”
→ Directly highlights a time-saving benefit.
Example 3:
“Learn to Speak Confidently on Camera, Without Feeling Awkward or Nervous.”
→ Addresses emotion (nervousness) and outcome (confidence).
Keep your headline short (under 15 words) and follow it with a brief supporting line or tagline that adds context.
Step 2: Show That You Understand Their Problem
Before you sell your course, you need to show your readers that you get them.
Describe the frustrations they’re facing using their own words, as if you’ve read their mind.
For example:
“You’ve spent hours researching how to build an online business, but you’re still stuck wondering where to start.”
When you clearly describe their struggle, they instantly feel seen and understood, and that builds trust.
Add the Hidden Source of the Problem
Go deeper by revealing what’s really holding them back.
Example:
“The problem isn’t that you lack motivation, it’s that you don’t have a clear, step-by-step roadmap to follow.”
By explaining the “hidden cause,” you naturally set up your course as the logical solution.
Step 3: Present Your Course as the Solution
Once your readers relate to the problem, it’s time to show them the way out.
Introduce your course as the bridge between their current situation and their desired outcome.
Example:
“That’s exactly why I created The Course Creator Accelerator, a step-by-step system that helps you build, launch, and sell your online course successfully, even if you have zero tech experience.”
In this section, focus on outcomes, not just features.
Instead of saying: “6 hours of video content and 10 worksheets.”
Say:
“In just 6 hours, you’ll go from a blank idea to a ready-to-sell course, with templates, checklists, and guidance at every step.”
Step 4: Share the Tangible Results
People buy results, not lessons.
Show them what their life will look like after taking your course.
You can do this in a few ways:
- Share real student transformations or testimonials
- Use before-and-after scenarios
- List the benefits in emotional and visual terms
Example (Course: Social Media Strategy Masterclass)
- You’ll finally have a content plan that actually drives engagement.
- You’ll stop guessing what to post every day.
- You’ll start attracting followers who convert into paying clients.
Paint a picture of success so vivid that they can already imagine themselves there.
Step 5: Outline What’s Inside the Course
Now that they’re interested, show them what they’ll actually get.
Break down your modules or lessons in a clean, benefit-focused list.
Example:
Inside the “Freelance Launchpad” Course, You’ll Get:
- Module 1: Finding your profitable niche, identify what clients are willing to pay for.
- Module 2: Crafting irresistible offers, learn how to pitch your skills confidently.
- Module 3: Setting up your systems, get ready-to-use templates for onboarding and payments.
- Module 4: Landing your first 3 clients, actionable outreach and closing strategies.
Keep it short and clear. Use bullet points to make it easy to skim.
Step 6: Build Credibility
This section answers the silent question:
“Why should I trust you to teach me this?”
Introduce yourself, share your story, and explain why you created the course.
Example:
“Hi, I’m Jamie, a content strategist who’s helped over 300 small business owners create successful digital courses. I built this program after realizing how many creators give up halfway because they lack a proven structure.”
You don’t need to be a celebrity to be credible. You just need to be a few steps ahead of your students.
If you have past results, media mentions, or testimonials, include them here for social proof.
Step 7: Add Social Proof (Testimonials & Success Stories)
Nothing sells like proof that it works.
If you’ve had beta students or clients, feature their feedback. Include their name, photo (if possible), and a short quote describing their transformation.
Example:
“Before this course, I had no idea how to structure my lessons. Within two weeks, I had a complete outline and started filming my videos!”, Laura S., Online Instructor
Don’t have testimonials yet? Offer your course at a discounted rate to a few early students in exchange for honest feedback. You can later use their stories to build trust.
Step 8: Use a Strong Call to Action (CTA)
Your call to action should be bold, visible, and repeated throughout the page.
Good CTAs are simple, action-oriented, and benefit-driven:
“Enroll Now and Start Building Your Course”
“Join the Program, Let’s Launch Your First Course Together”
“Start Learning Today (Limited Spots Available)”
Avoid generic CTAs like “Submit” or “Buy Now.” Instead, remind readers of the outcome they’re getting when they click.
You can place your CTA:
- After the introduction
- After the course outline
- After testimonials
- At the very end of the page
Each section should gently guide readers toward taking action.
Step 9: Include a Risk-Free Guarantee
Offering a refund or satisfaction guarantee removes hesitation.
It tells potential students: “I believe in this course enough to take the risk off your shoulders.”
A simple 30-day money-back guarantee works perfectly.
Example:
“Try the program for 30 days, and if you don’t feel it’s helping you, email us, we’ll refund your purchase. No questions asked.”
This builds trust and shows confidence in your product.
Step 10: Emphasize the Cost of Inaction
After explaining what students will gain, remind them what happens if they don’t act.
This isn’t about fear, it’s about perspective.
Example:
“You could keep trying to piece things together from random YouTube videos… or you could finally have a complete, proven system to follow.”
Or:
“Imagine looking back six months from now, wishing you started today.”
This subtle nudge helps hesitant buyers make the leap.
Step 11: Add an FAQ Section
Your FAQ clears the final roadblocks to purchase.
Include answers to common questions such as:
- “Do I need prior experience?”
- “How long do I have access to the course?”
- “Can I go at my own pace?”
- “What if I don’t like it?”
- “Will there be live sessions?”
Keep answers short, reassuring, and transparent.
Step 12: Design for Readability and Flow
Even great copy won’t convert if your page looks cluttered.
Follow these design principles:
- Use short paragraphs and plenty of white space.
- Highlight key phrases in bold.
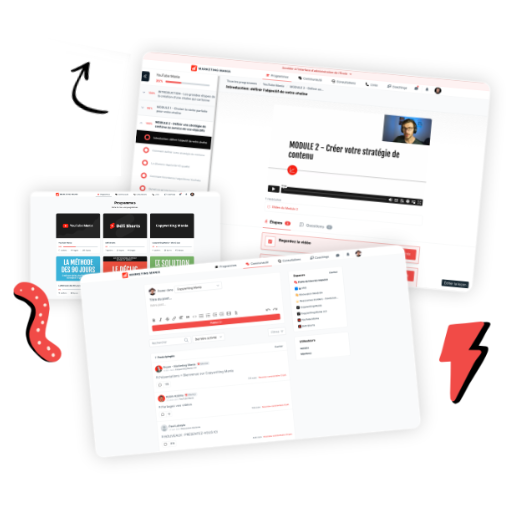
- Add visuals, such as screenshots, mockups, or video previews.
- Keep your CTA buttons consistent in color and wording.
- Use a single-column layout for mobile-friendliness.
Simple, clean design beats fancy graphics every time.
Bonus Tips for Increasing Course Sales in 2026
Marketing and design trends change fast, but these timeless principles still work:
- Use video. A short video at the top of your page can increase conversions by showing your personality.
- Add urgency. Offer limited-time bonuses or early-bird pricing.
- Highlight student results. People trust peers more than creators.
- Make your mobile version perfect. Most learners will view your page on their phone.
- Track your data. Use tools like Google Analytics or Hotjar to see how visitors behave on your page.
Conclusion: Your Sales Page Is Your Best Salesperson
Your course sales page isn’t just another webpage, it is the most important marketing asset you’ll ever create.
A well-written page sells your course 24/7, even while you sleep. So take the time to craft your story, structure your content, and design a page that clearly communicates the transformation you’re offering.
Once your message is clear and your layout flows naturally, you’ll start seeing what every creator loves, more sign-ups, more impact, and more sales.


